109 lines
4.1 KiB
Plaintext
109 lines
4.1 KiB
Plaintext
|
|
# Installation
|
||
|
|
|
||
|
|
To get a local copy up and running, please follow these simple steps.
|
||
|
|
|
||
|
|
## Prerequisites
|
||
|
|
|
||
|
|
Here is what you need to be able to run Cal.
|
||
|
|
|
||
|
|
- Node.js
|
||
|
|
- PostgreSQL
|
||
|
|
- Yarn _(recommended)_
|
||
|
|
|
||
|
|
> If you want to enable any of the available integrations, you may want to obtain additional credentials for each one. More details on this can be found below under the integrations category.
|
||
|
|
|
||
|
|
## Setup
|
||
|
|
|
||
|
|
1. Clone the repo
|
||
|
|
|
||
|
|
```sh
|
||
|
|
git clone https://github.com/calcom/cal.com.git
|
||
|
|
```
|
||
|
|
|
||
|
|
1. Go to the project folder
|
||
|
|
|
||
|
|
```sh
|
||
|
|
cd calendso
|
||
|
|
```
|
||
|
|
|
||
|
|
1. Copy `.env.example` to `.env`
|
||
|
|
|
||
|
|
```sh
|
||
|
|
cp .env.example .env
|
||
|
|
```
|
||
|
|
|
||
|
|
1. Install packages with yarn
|
||
|
|
|
||
|
|
```sh
|
||
|
|
yarn
|
||
|
|
```
|
||
|
|
|
||
|
|
### Quick start with `yarn dx`
|
||
|
|
|
||
|
|
> - **Requires Docker and Docker Compose to be installed**
|
||
|
|
> - Will start a local Postgres instance with a few test users - the credentials will be logged in the console
|
||
|
|
```sh
|
||
|
|
yarn dx
|
||
|
|
```
|
||
|
|
|
||
|
|
### Manual setup
|
||
|
|
|
||
|
|
1. Configure environment variables in the .env file. Replace `<user>`, `<pass>`, `<db-host>`, `<db-port>` with their applicable values
|
||
|
|
|
||
|
|
```text
|
||
|
|
DATABASE_URL='postgresql://<user>:<pass>@<db-host>:<db-port>'
|
||
|
|
```
|
||
|
|
|
||
|
|
<details>
|
||
|
|
<summary>If you don't know how to configure the DATABASE_URL, then follow the steps here to create a quick DB using Heroku</summary>
|
||
|
|
|
||
|
|
1. Create a free account with [Heroku](https://www.heroku.com/).
|
||
|
|
|
||
|
|
2. Create a new app.
|
||
|
|
<img width="306" alt="Create an App" src="https://user-images.githubusercontent.com/16905768/115322780-b3d58c00-a17e-11eb-8a52-b758fb0ea942.png" />
|
||
|
|
|
||
|
|
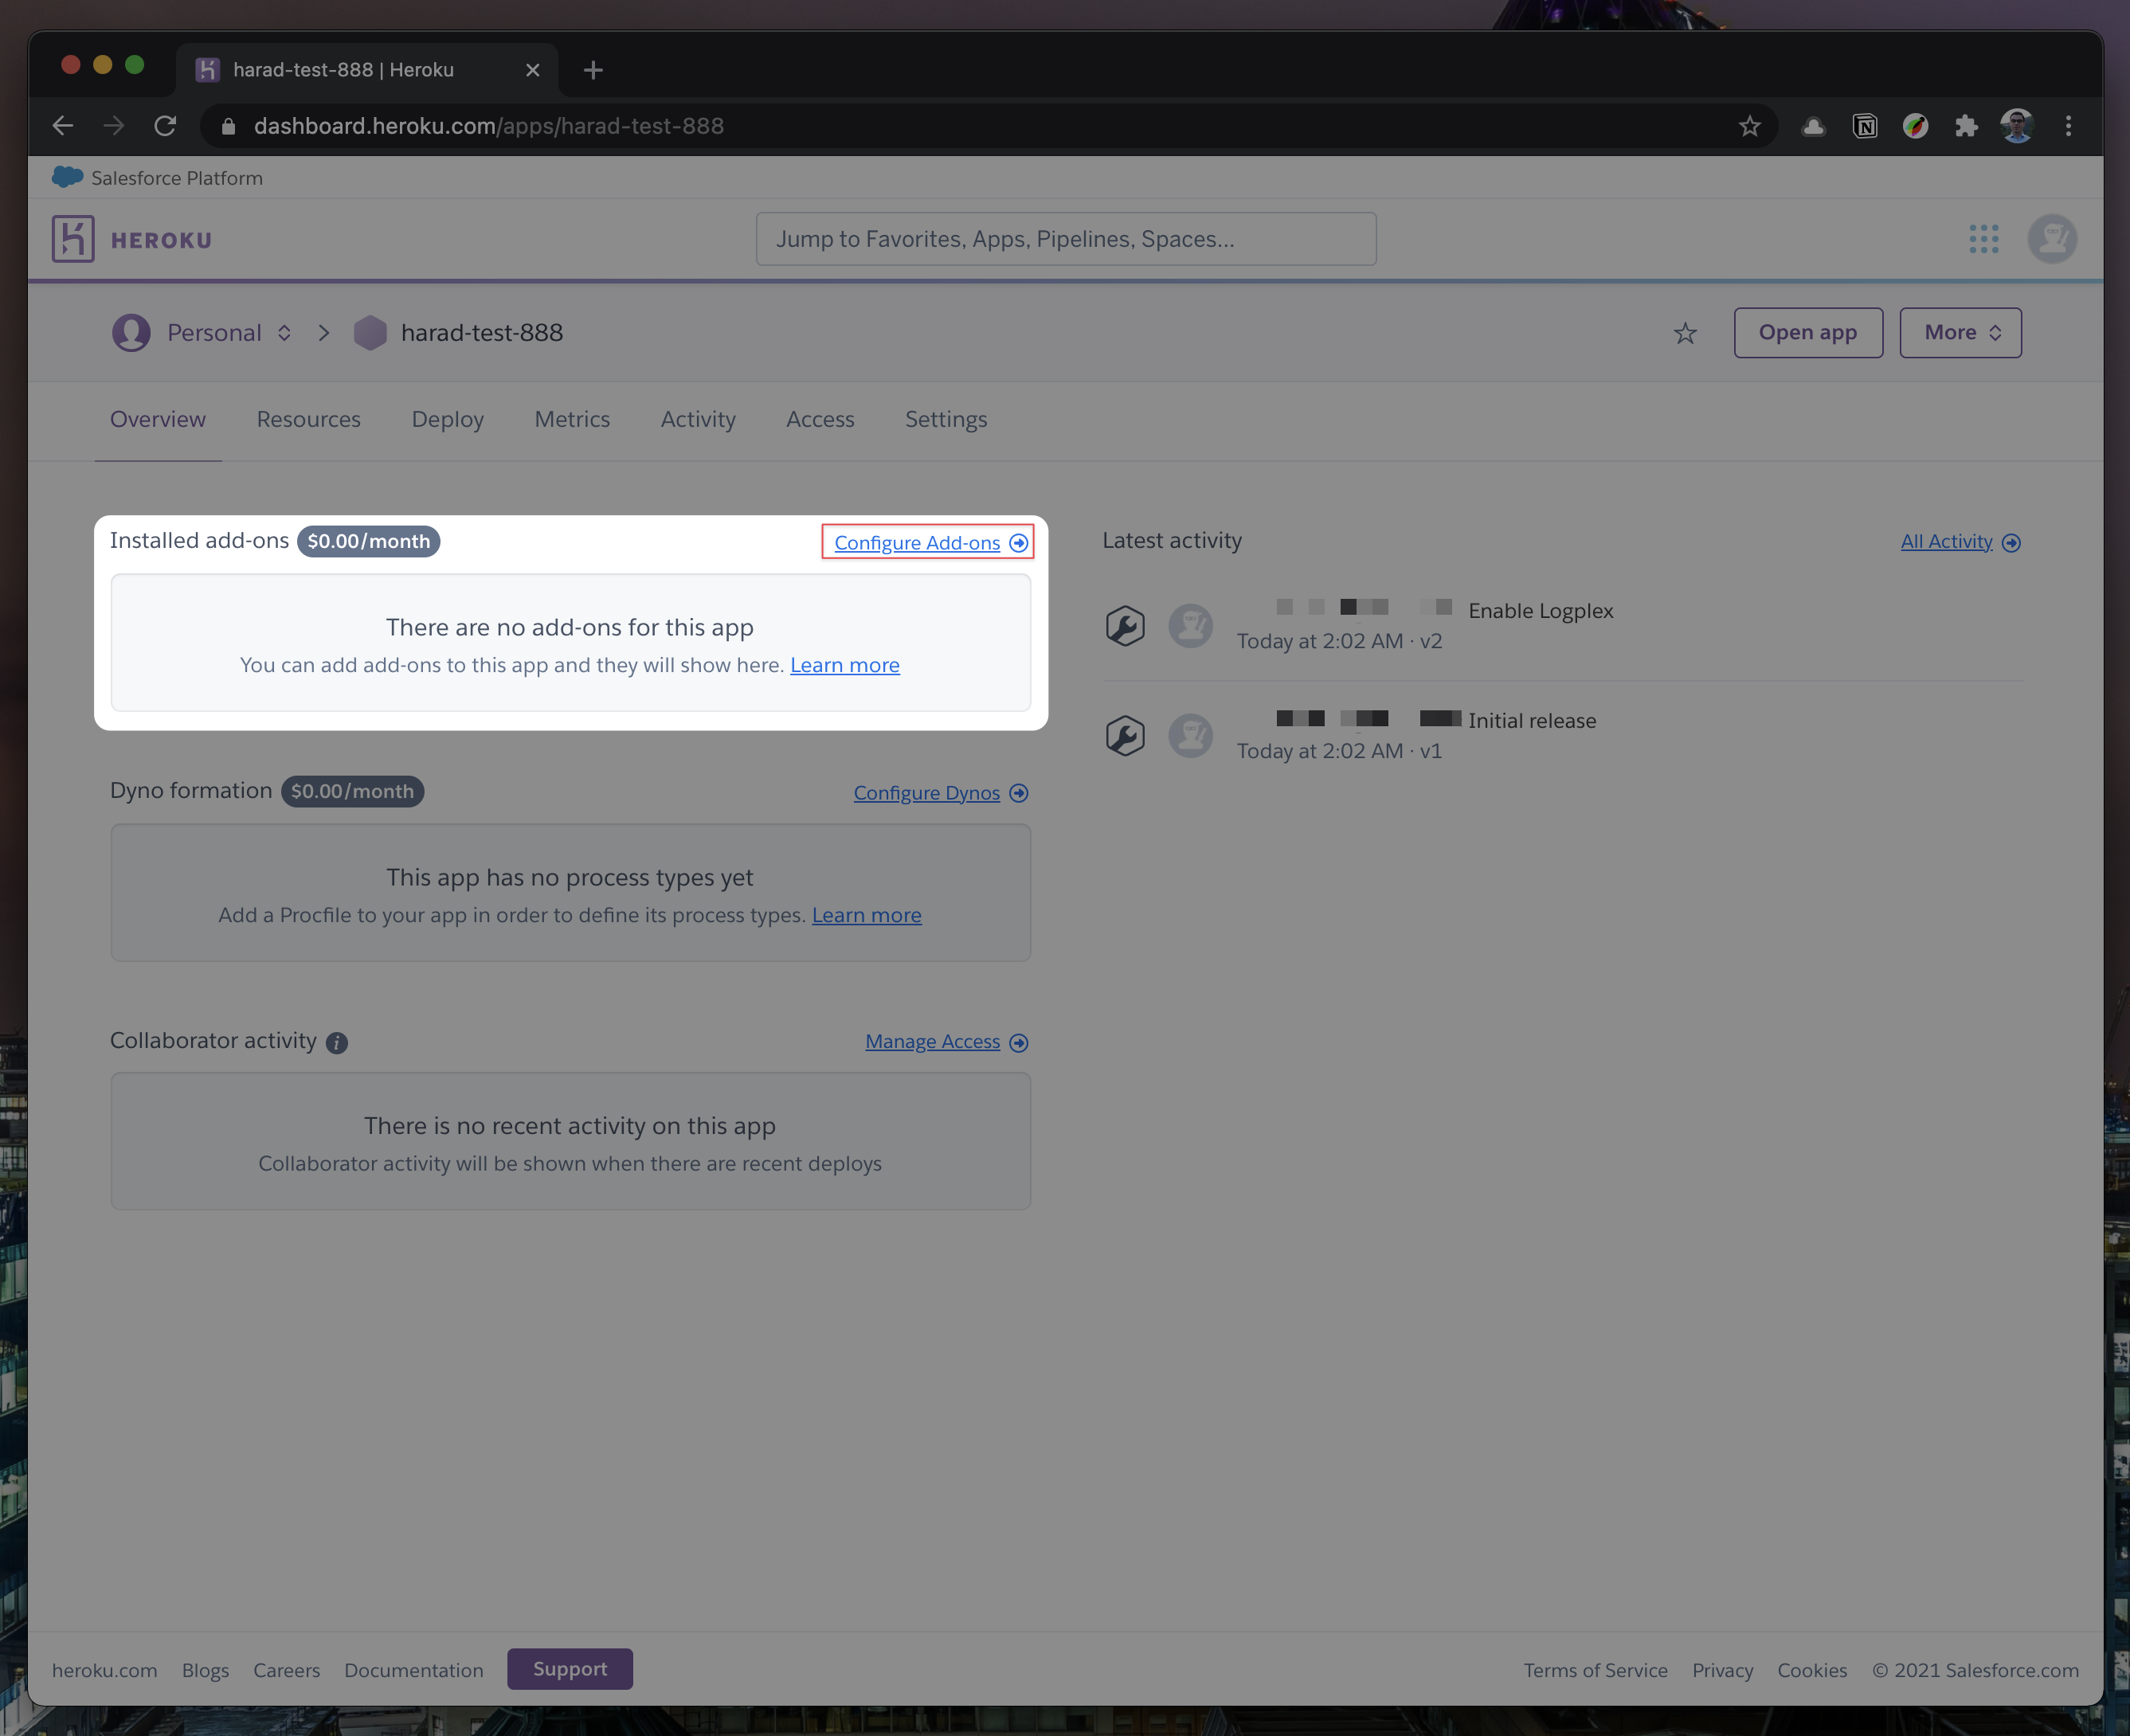
3. In your new app, go to `Overview` and next to `Installed add-ons`, click `Configure Add-ons`. We need this to set up our database.
|
||
|
|
|
||
|
|
|
||
|
|
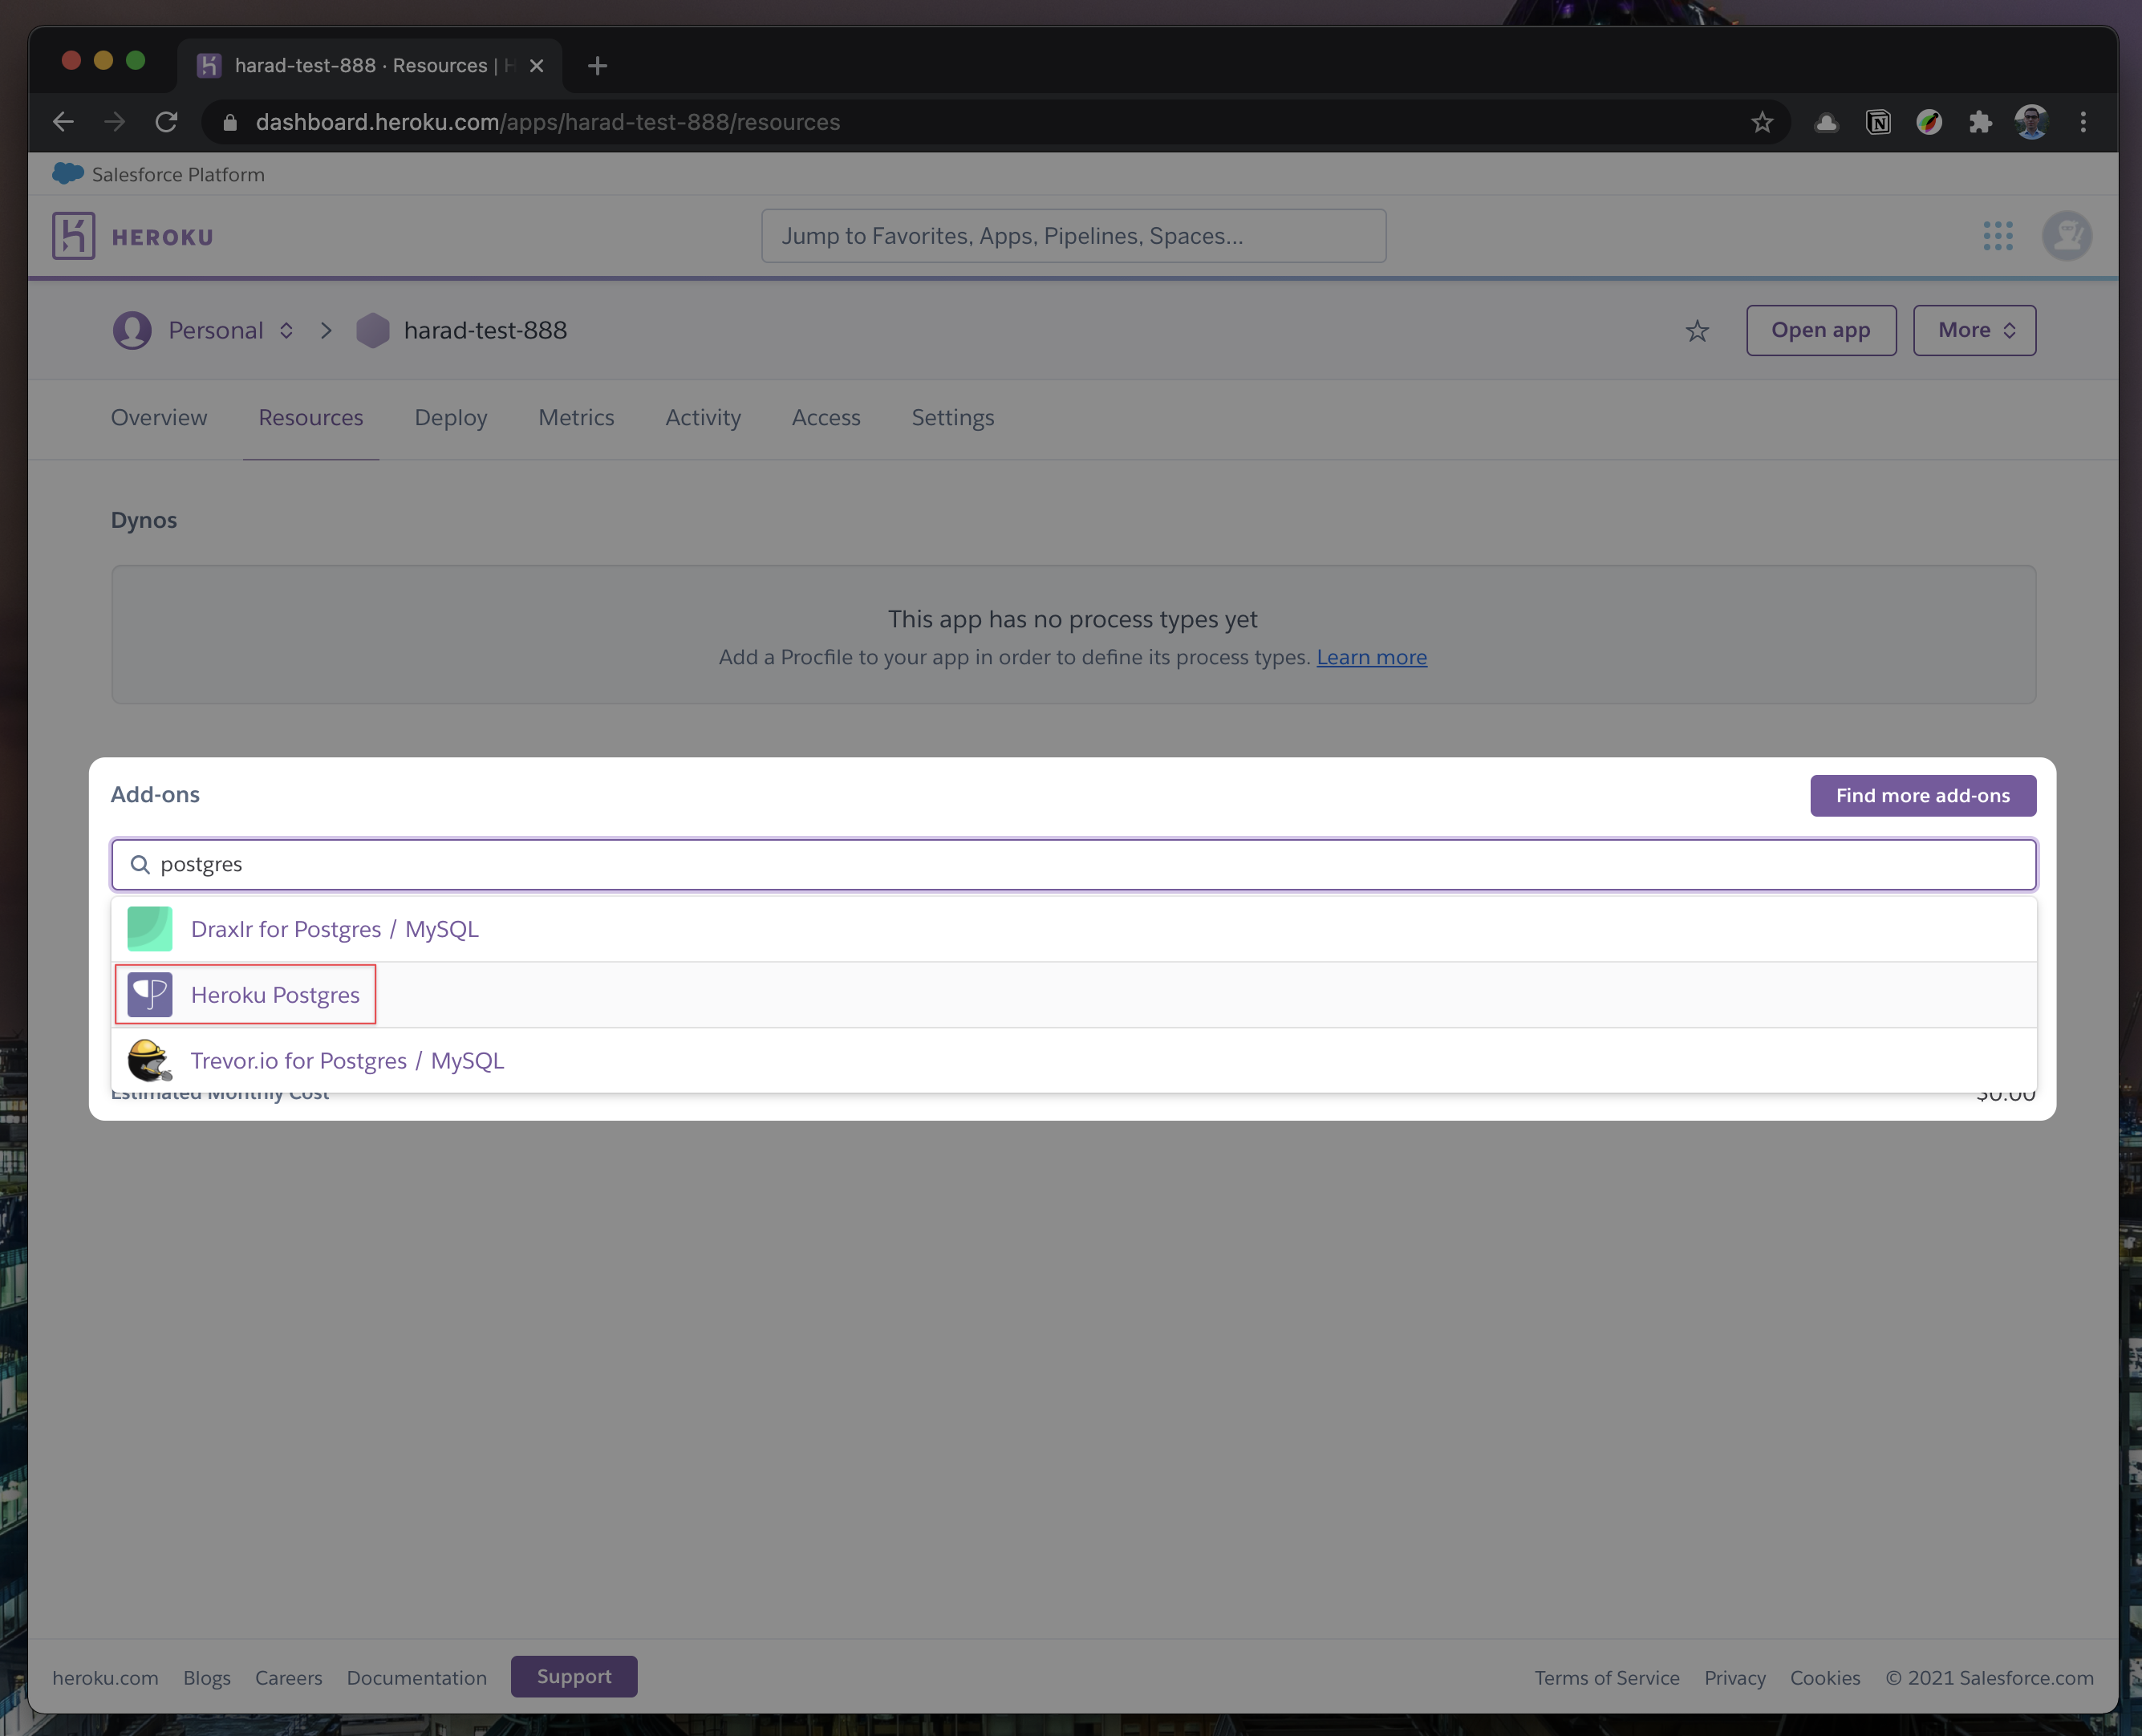
4. Once you clicked on `Configure Add-ons`, click on `Find more add-ons` and search for `postgres`. One of the options will be `Heroku Postgres` - click on that option.
|
||
|
|
|
||
|
|
|
||
|
|
5. Once the pop-up appears, click `Submit Order Form` - plan name should be `Hobby Dev - Free`.
|
||
|
|
<img width="512" alt="Submit Order Form" src="https://user-images.githubusercontent.com/16905768/115323265-b4baed80-a17f-11eb-99f0-d67f019aa6df.png" />
|
||
|
|
|
||
|
|
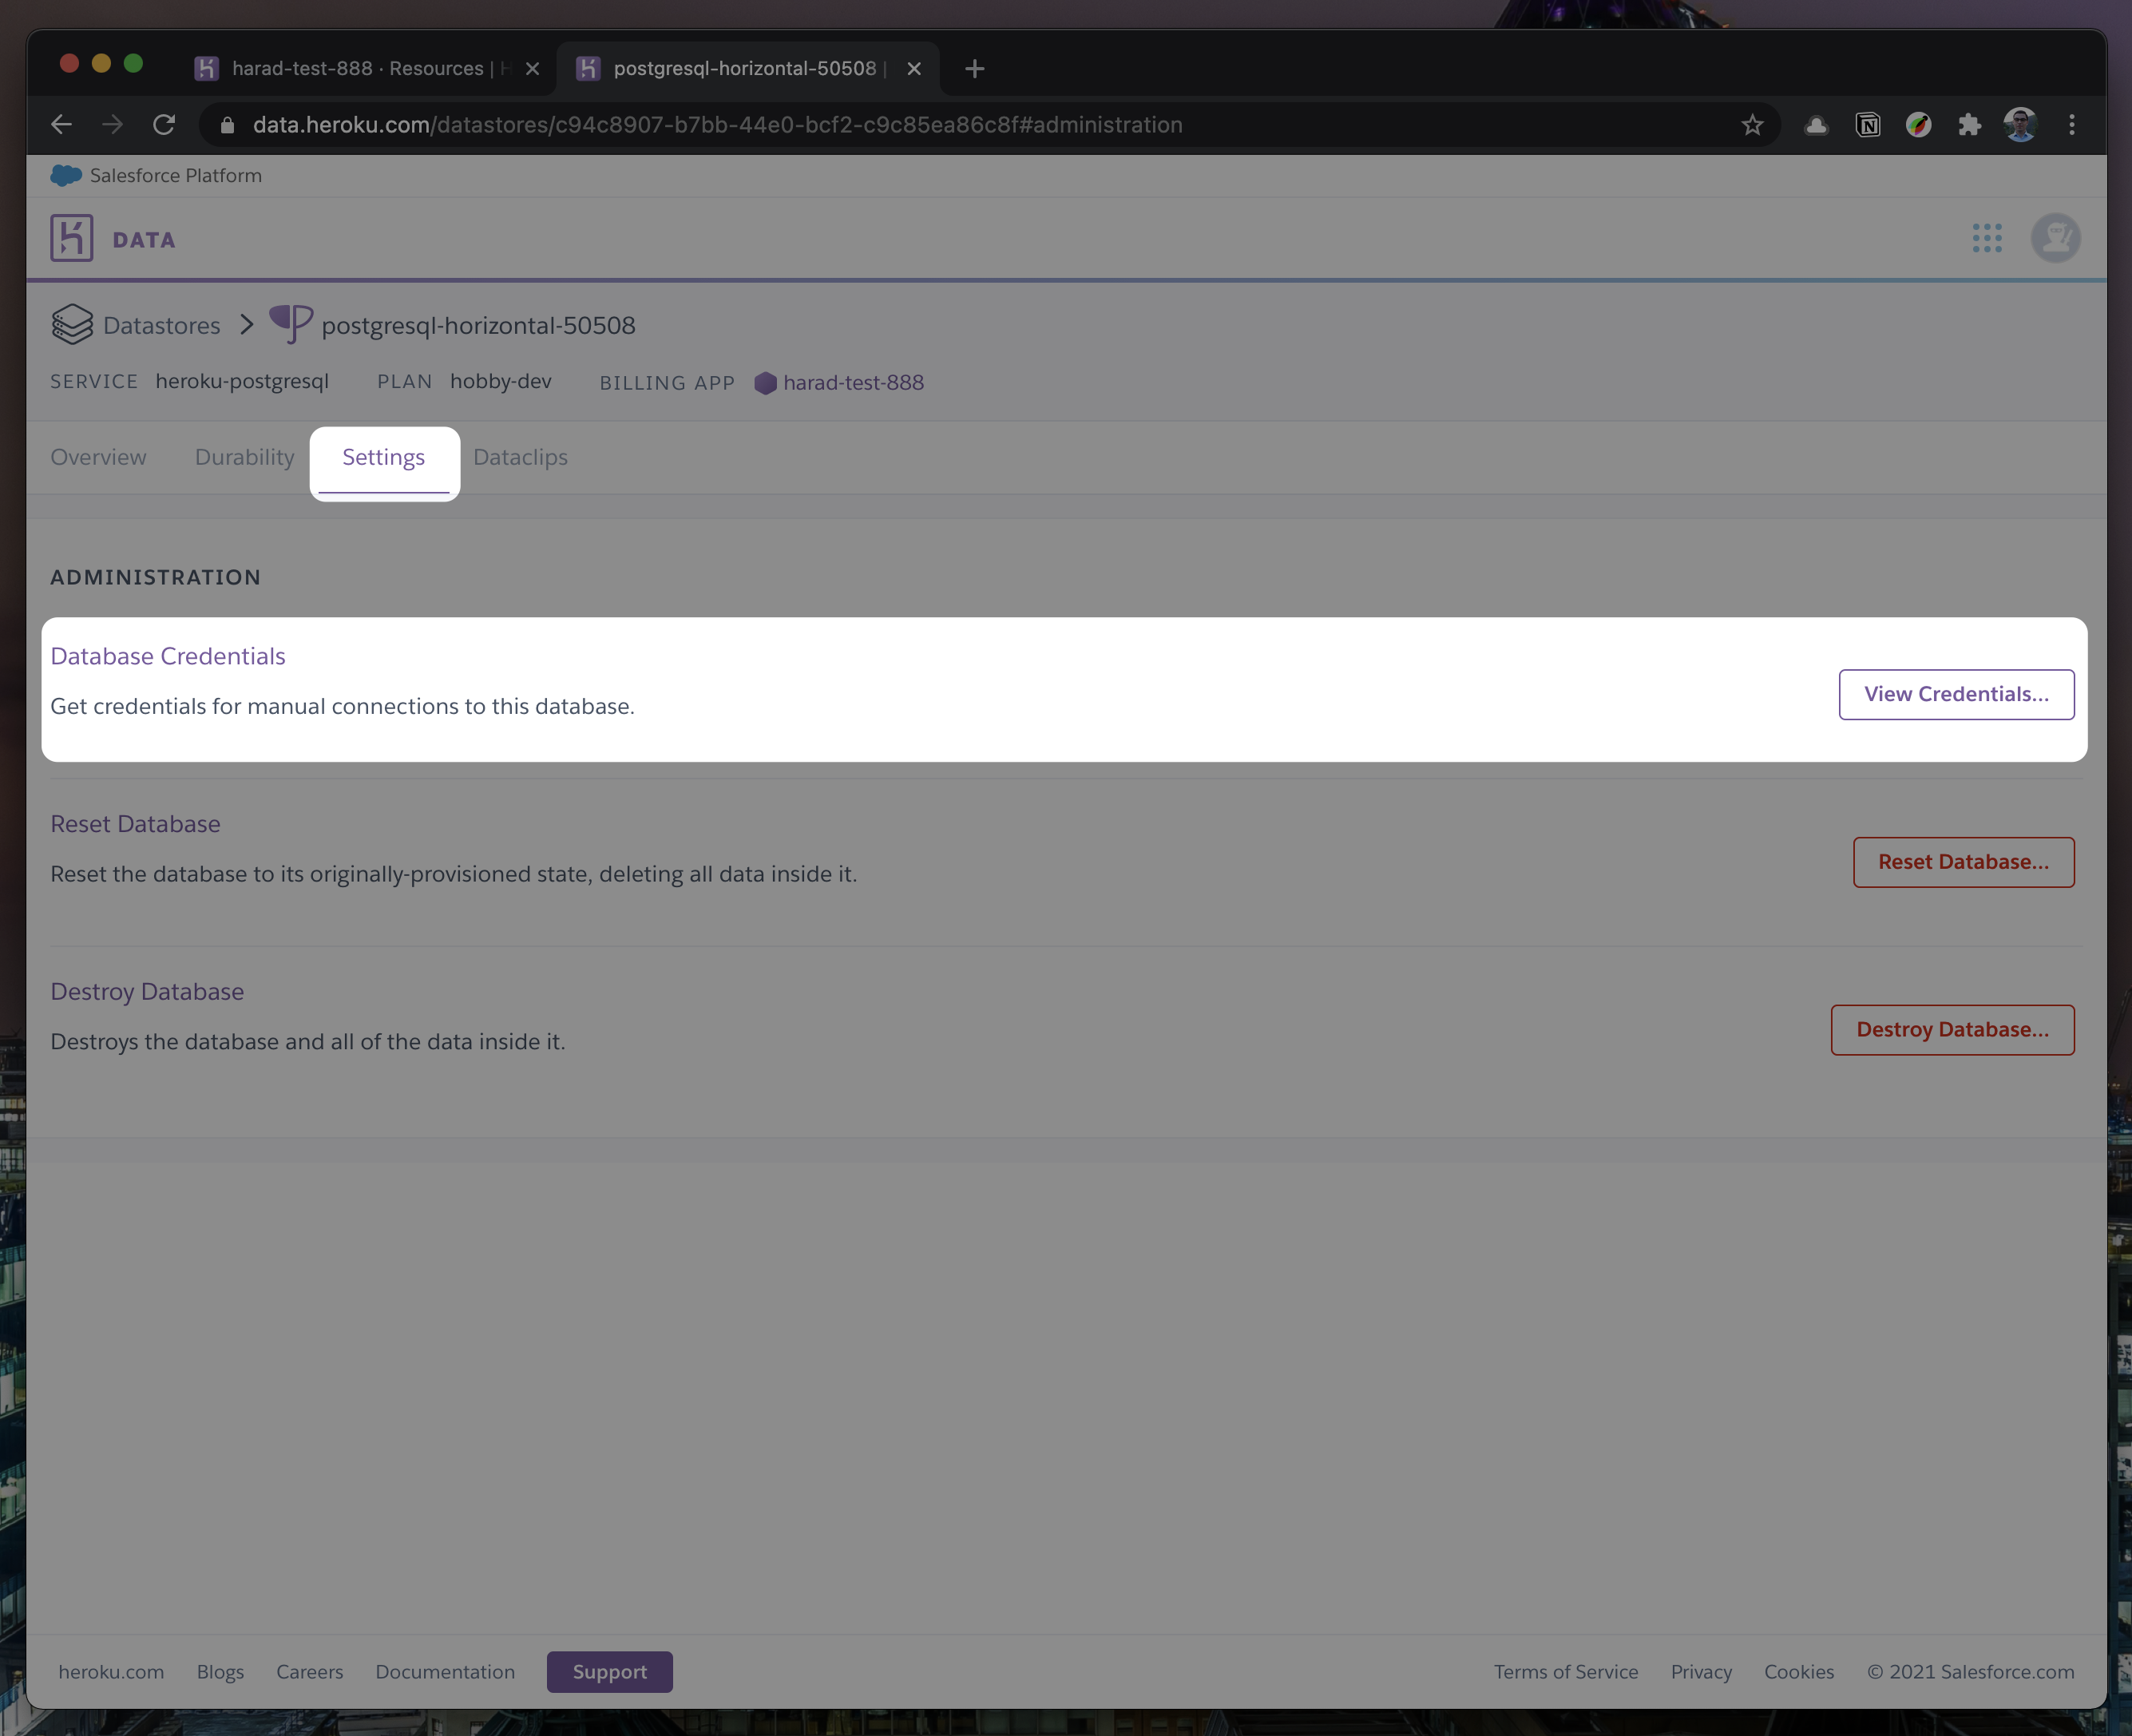
6. Once you completed the above steps, click on your newly created `Heroku Postgres` and go to its `Settings`.
|
||
|
|
|
||
|
|
|
||
|
|
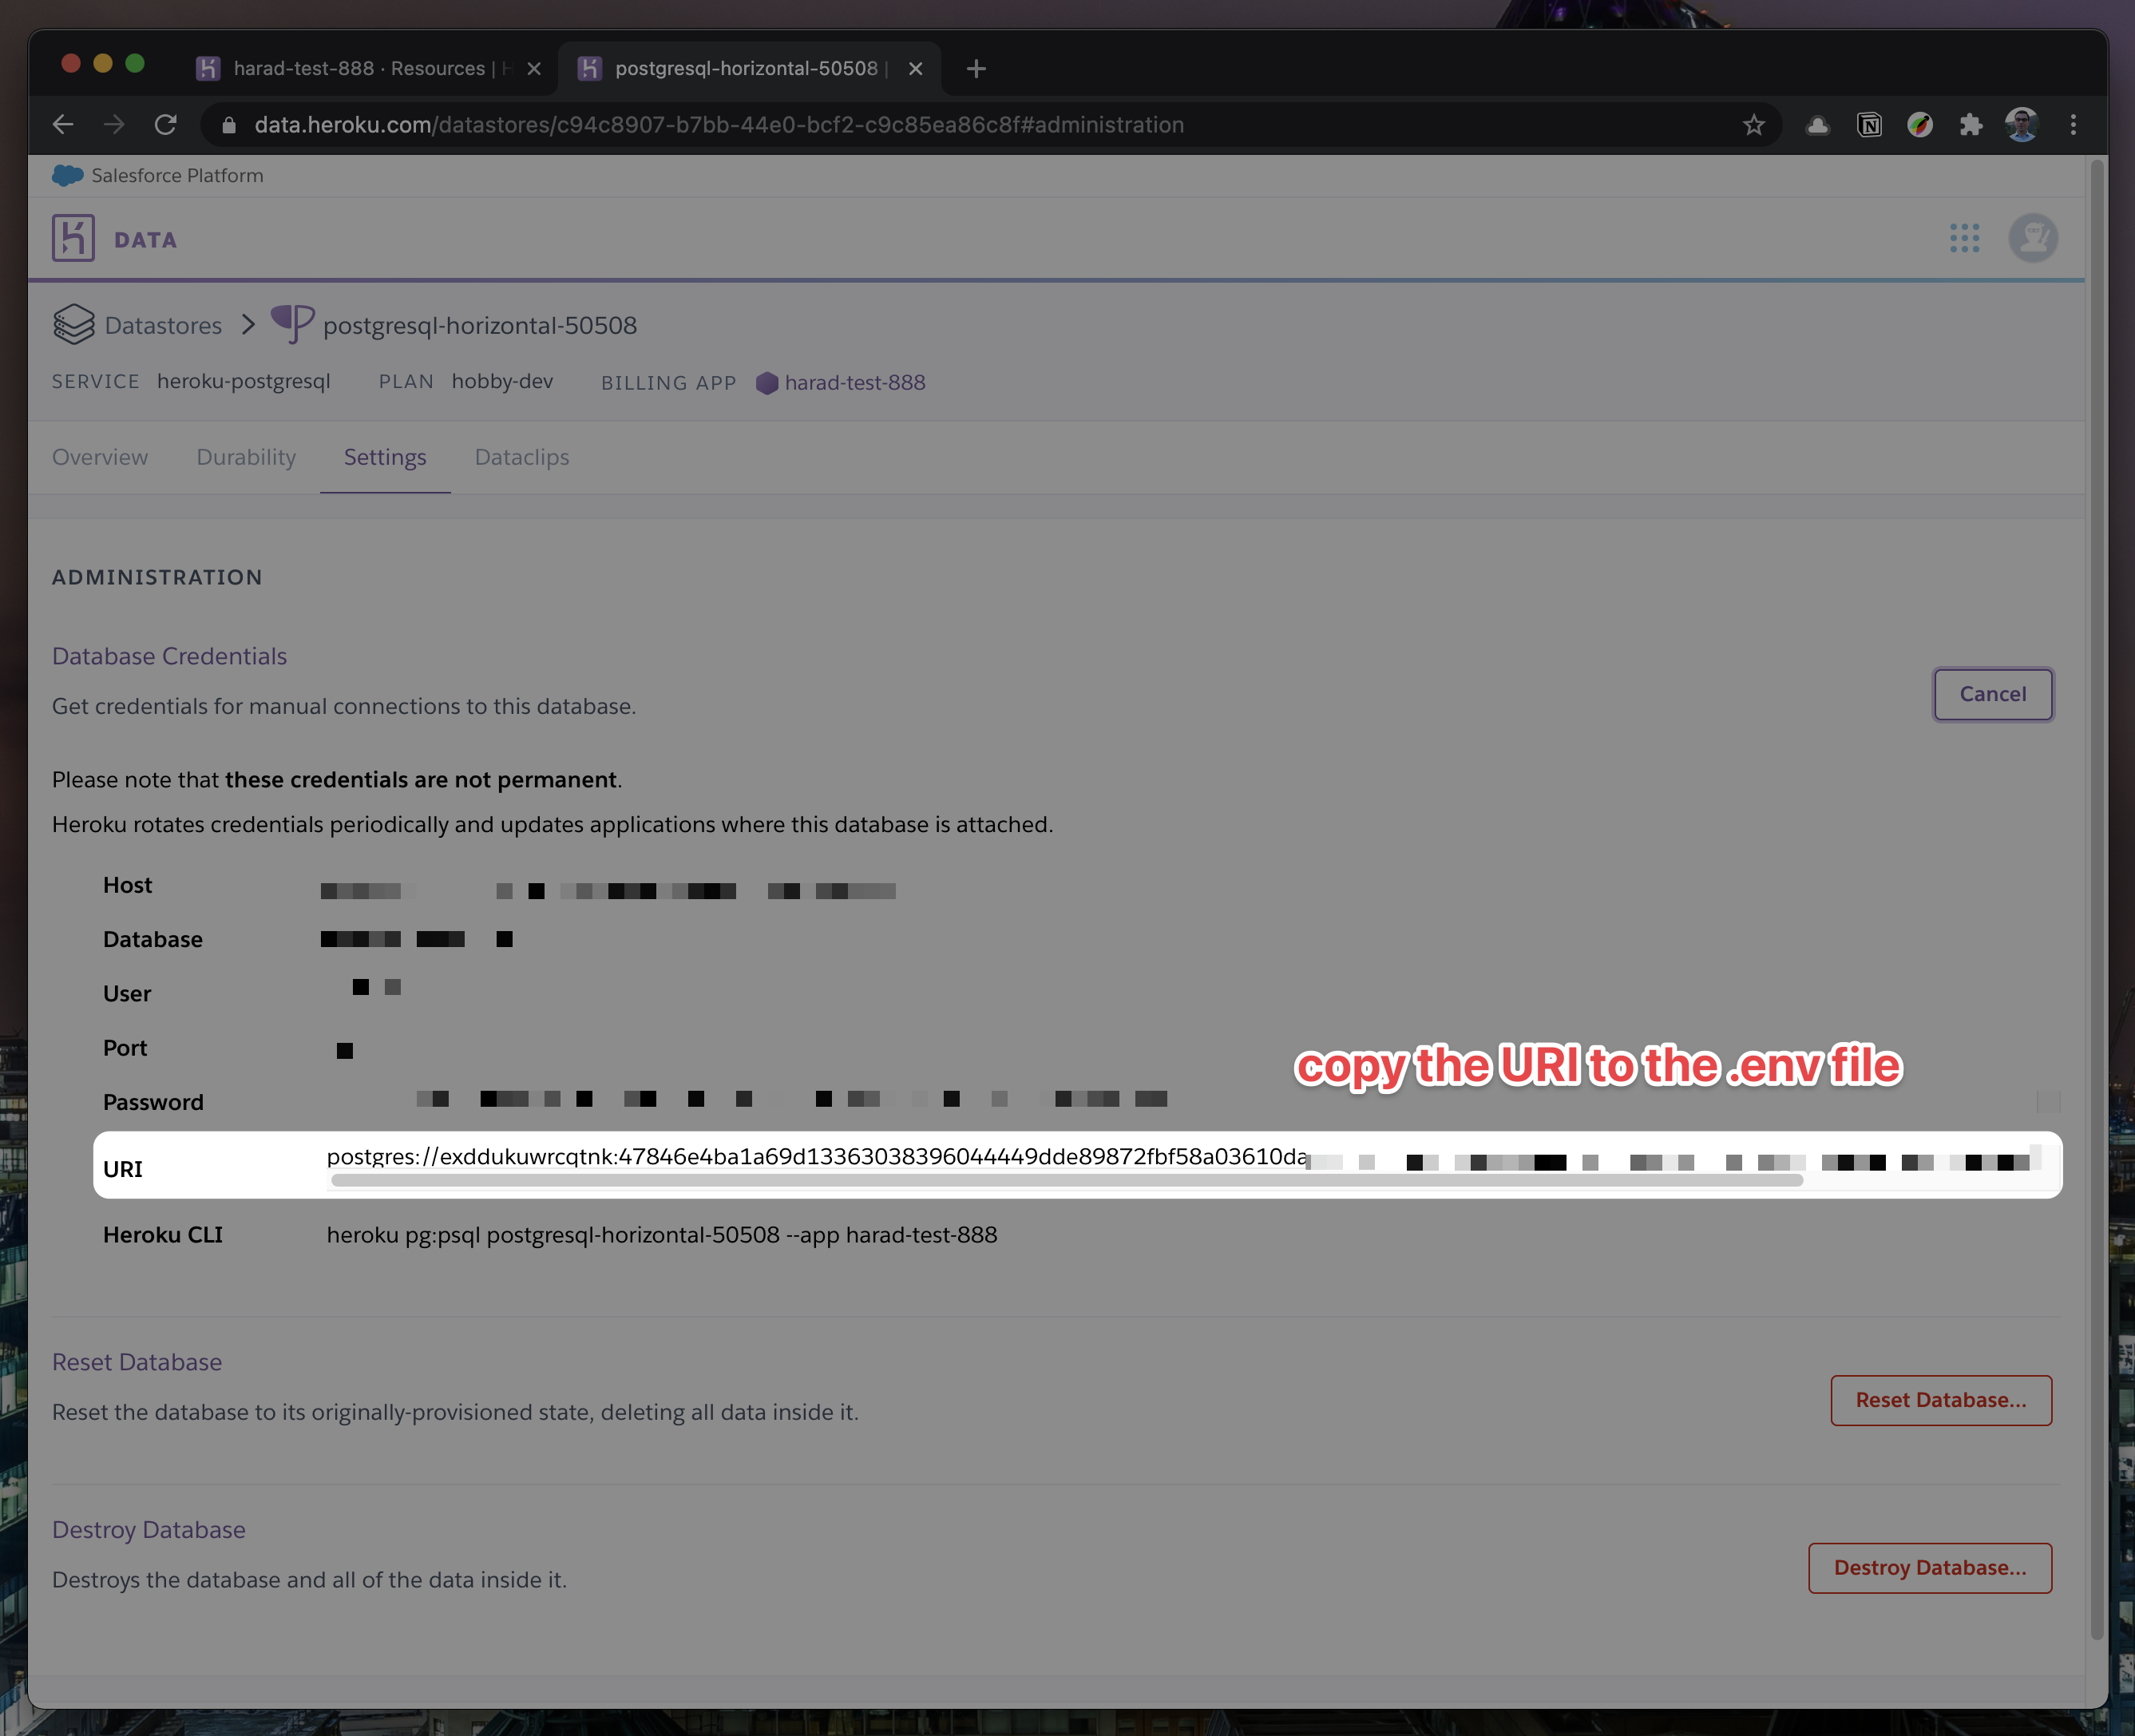
7. In `Settings`, copy your URI to your Cal.com .env file and replace the `postgresql://<user>:<pass>@<db-host>:<db-port>` with it.
|
||
|
|
|
||
|
|

|
||
|
|
|
||
|
|
8. To view your DB, once you add new data in Prisma, you can use [Heroku Data Explorer](https://heroku-data-explorer.herokuapp.com/).
|
||
|
|
</details>
|
||
|
|
|
||
|
|
1. Set a 32 character random string in your .env file for the `CALENDSO_ENCRYPTION_KEY` (You can use a command like `openssl rand -base64 24` to generate one).
|
||
|
|
1. Set up the database using the Prisma schema (found in `prisma/schema.prisma`)
|
||
|
|
|
||
|
|
```sh
|
||
|
|
npx prisma migrate deploy
|
||
|
|
```
|
||
|
|
|
||
|
|
1. Run (in development mode)
|
||
|
|
|
||
|
|
```sh
|
||
|
|
yarn dev --scope=@calcom/web
|
||
|
|
```
|
||
|
|
|
||
|
|
### Setting up your first user
|
||
|
|
|
||
|
|
1. Open [Prisma Studio](https://www.prisma.io/studio) to look at or modify the database content:
|
||
|
|
|
||
|
|
```sh
|
||
|
|
npx prisma studio
|
||
|
|
```
|
||
|
|
|
||
|
|
1. Click on the `User` model to add a new user record.
|
||
|
|
1. Fill out the fields `email`, `username`, `password`, and set `metadata` to empty `{}` (remembering to encrypt your password with [BCrypt](https://bcrypt-generator.com/)) and click `Save 1 Record` to create your first user.
|
||
|
|
> New users are set on a `TRIAL` plan by default. You might want to adjust this behavior to your needs in the `prisma/schema.prisma` file.
|
||
|
|
1. Open a browser to [port 3000](http://localhost:3000) and login with your just created, first user.
|